
#1 It’s Not Your Camera
The first thing to realize is that when your cave images don’t turn out, it has nothing to do with your camera. It has everything to do with your understanding of light, composition, and how to use the technical components of your camera to creatively communicate your experience underground. A great cave photographer can take a $5000 camera and a $100 camera and create the same amazing shot. If your camera isn’t taking very good pictures it’s probably not a mechanical issue.
There is an urban legend out there, a story of painter Pablo Picasso, who was asked by an individual to paint a portrait. Picasso consented, pulled out the instruments of his trade, whipped out a portrait in a few minutes, and handed it to the individual.
“How much to I owe you?”, the individual responded.
Picasso replied that the cost would be several thousand dollars, to which the individual said, “But that only took you a few minutes”.
“No, my friend,” responded Picasso, “it took me a lifetime.”
There is no shortcut to great cave photography. It requires an investment of time and effort to produce great images that accurately communicate the emotional experience of being in a cave.

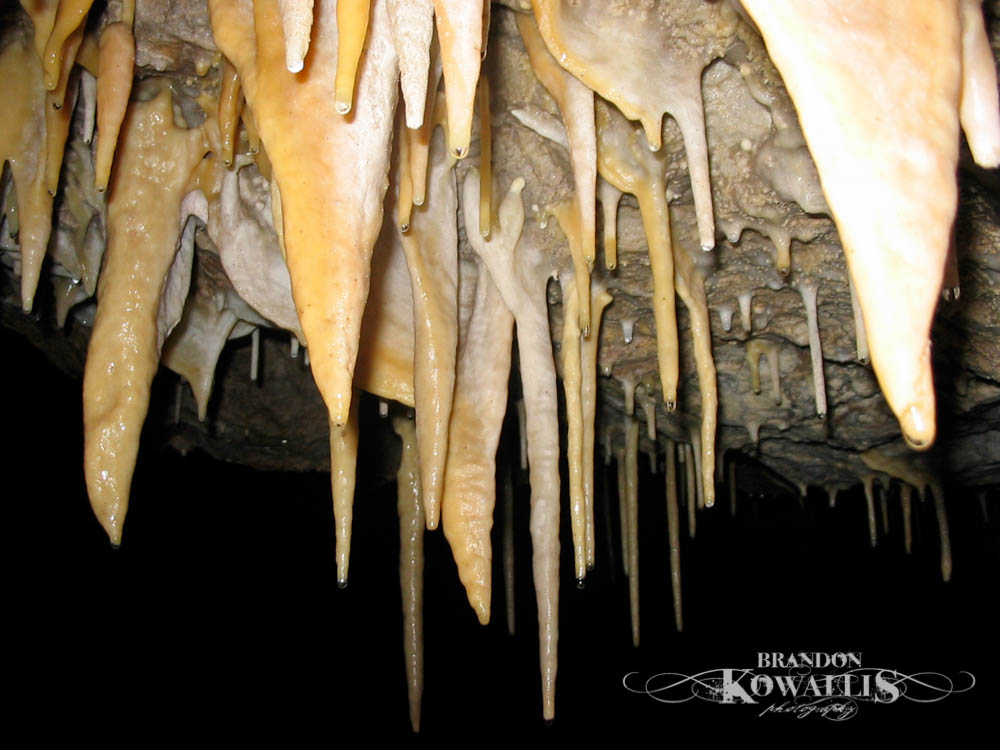
Shot on a 2 megapixel Canon point and shoot camera.
#2 It’s Not How Much You Know About Cameras and Photography
I’ve run into lots of individuals whose technical knowledge base of cameras is far beyond anything I would even want to approach. It is almost intimidating to talk to these people who thrive on using technical jargon seemingly to impress other photographers. They really dig comparing effective pixel numbers, optical characteristics and flaws of lenses, processor speeds, GPS abilities, and on and on. They seem to know everything there is to know, inside and out, backward and forward in time, about cameras . . . And yet they can’t seem to take a great photo if their life depended on it.
The other weird thing about this group is that they think their photos are the epitome of excellence. I suppose they are when it comes to technical execution; exposures are right on, colors are balanced, composition follows the rule of thirds as though the images was mathematically drafted by an engineer. The only people their images seem to inspire however, are other photo tech geeks who get so distracted by the technical components they probably don’t even recognize what the subject is or what that image conveys.
Bottom line, photography is about visual communication. We all know individuals who have an enormous vocabulary and yet, can’t seem to compose a single sentence that is first, understandable by the audience, and second, moves that audience to experience an emotional response. Technical knowledge about cameras and photo principles can definitely enhance our photography, but if you can’t express your vision or create images that convey what it is you want to convey, then the only good it does you is help you intimidate or confuse the vacuous with muddled diction.
#3 Disable Your On Camera Flash
One of the biggest challenges with cave photography is the fact that there is no light in caves. In the outside world we are used to everything being lit for us. We simply lift our camera and release the shutter, and voilà . . . we made a picture. With caves however we have to start thinking creatively about something we never really have to think about – light.
Why is it that what looks really cool when you are on a cave tour never seems to look the same when you get home and look at the pictures you took on the tour? The first problem is that the light that is lighting the formations on the tour is different than the light that lit the formations when you took your picture. Cave tour lights shine on the formations from various angles and intensities, and even though most people can’t see it, colors. The light on your camera flash is often much brighter than the lights in the cave, has a different color, and shines in one direction. So when you release your shutter the camera flash dominates the picture and removes any effect the other lights had on the formations. The flash creates a very “washed-out” photograph devoid of shadows and texture.
There are two options for overcoming this. The first is to disable your camera flash. The problem with this is that even though the lights may appear bright, to the camera they are extremely dim, requiring long shutter speeds, which means that you have to hold your camera extremely still or you will end up with blurry pictures. The only way to do this is to use a tripod, which in many tour caves is frowned upon.
The second option is to remove the flash from the camera and position it to the side or back of the object you are taking a picture of. This works great in non-tour caves because you are not limited to a path that you must stay on, though you do have to be extremely careful not to damage anything as you move around. This may be a little difficult to achieve however, in tour caves where you are not allowed to leave the trail. By removing the flash from the front or top of the camera, or purchasing a separate flash and turning off your on camera flash, you are able to create greater texture, and depth in the formations you are photographing simply by placing the flash to the side or behind the formations. You’ll find this to be one of the best things you can do to really improve your cave images.
Typical cave photograph when the flash on your camera fires.
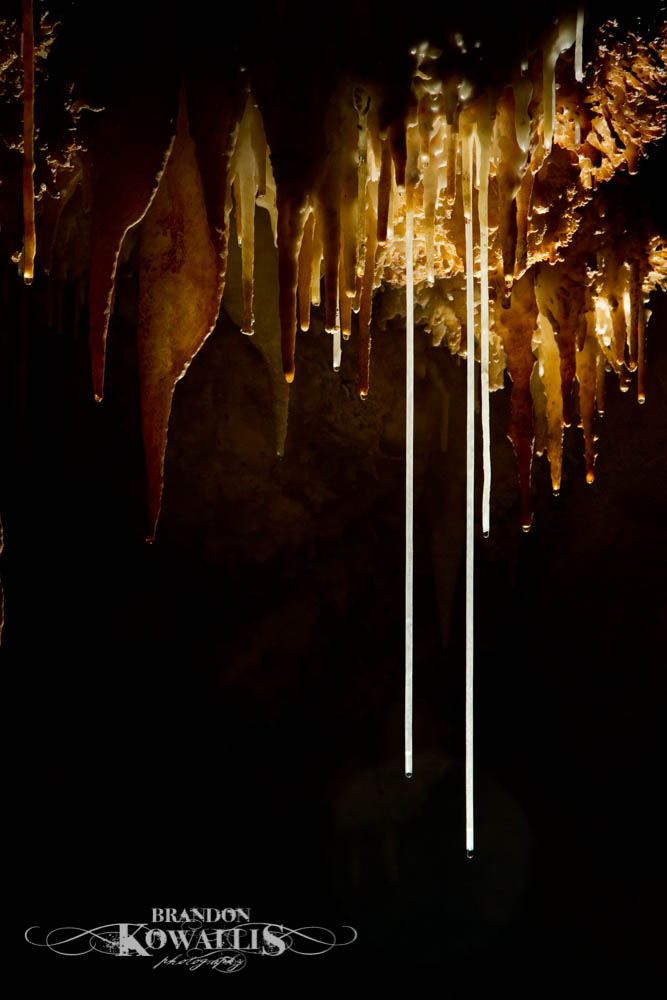
The results of disabling the camera flash and moving the main light source off the camera.
#4 Use More Than One Light Source
Because the camera sees the world in a much more limited way than human beings, a single light source often will not light a cave photographically the same way it appears to our eyes. Shadows that seemed to have detail when we were in the cave, will come out totally black when we view the final image. This is referred to as “dynamic range”. When there is a large range of light intensity, the camera can only see a small range of those intensities. So if I make the brightness areas look good, the dark areas will be totally black, and if I make the dark areas look good, the bright areas will be totally white.
Using only one light source. Even though I could see everything while taking this shot. The camera’s dynamic range was severely limited.
The solution is to add additional light using light sources of varying intensity to bring out the detail in the dark areas. The trick however, is making sure that each light source throws out just the right amount of light so that your shadows aren’t too bright or too dark. This of course takes time and practice and intuition to figure out what the best settings to use are.

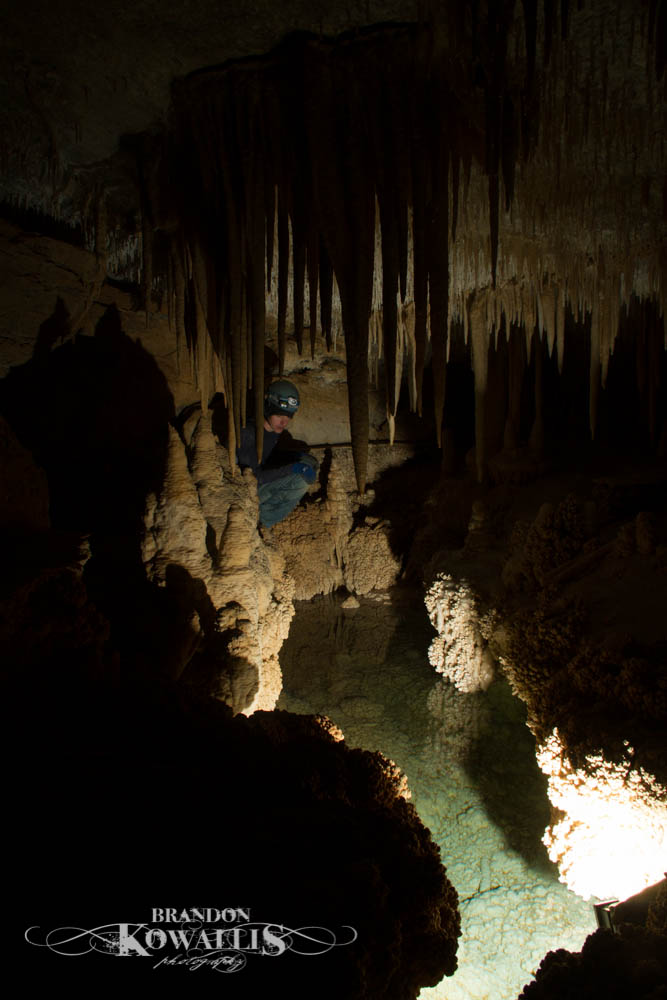
Utilizing multiple light sources to fully illuminate the scene and fill in shadows that originally fell outside of the dynamic range.
One thing you do want to watch out for when you are using multiple light sources and a tripod is ghosting. Ghosting occurs when 1) your flashes aren’t synced to fire at the exact same time and 2) if your subject or camera moves between flashes going off. So for example, lets say you are photographing your friend against a spectacular flowstone backdrop. You have one flash on the background (flash 1) and another on your friend (flash 2).
If flash 1 goes off by itself you would have a nice shot of flowstone with a silhouette of your friend. If flash 2 goes off by itself you would have a nice picture of your friend against a black backdrop. If they go off together, great looking friend, great looking formations. If however, flash 1 fires and there are a couple of seconds delay where you friend shifts before the second flash fires, you will end up with a shot of your friend with a black rim around one side of him and the other side will of him will look like a ghost that is partially transparent. So either your friend holds ridiculously still or you find a way to sync your flashes.
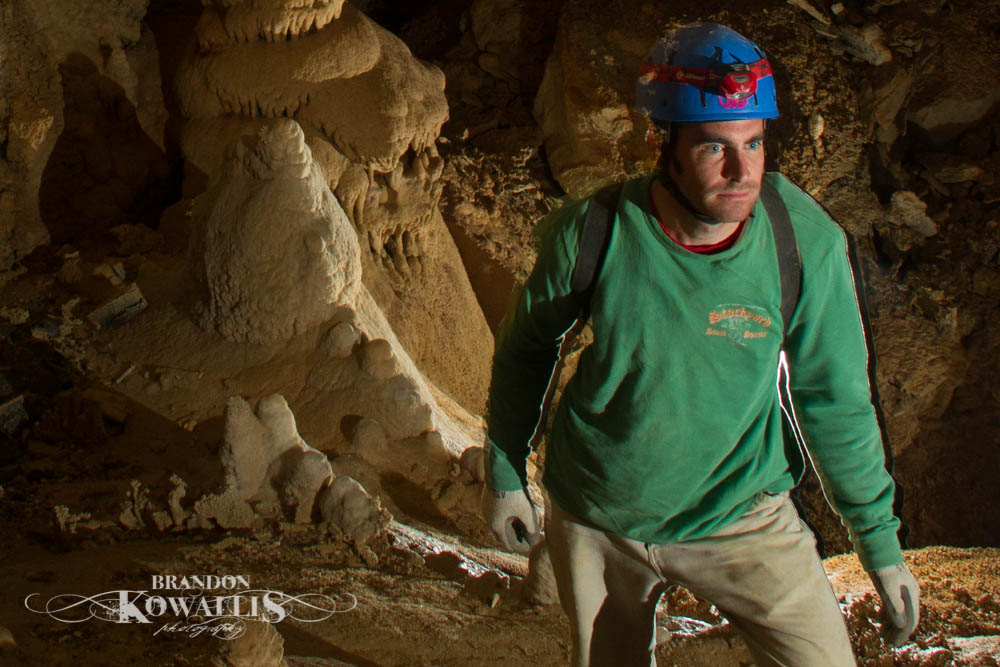
You’ll notice in this shot that the left edge of Kory (our caver) blends into the background or is semi transparent. On the right edge there is a black border.
#5 Understand Exposure
Before you begin photographing the underground world of caves it would be a good idea to learn about shutter speeds, apertures, ISO, and how each of those affects the final exposure. Once you have that figured out, the next thing to understand is that shutter speeds are virtually irrelevant when it comes to using flashes underground.
Because there is zero light in a cave you could open your shutter for 1/1,000,000th of a second or 5 years and you would get the exact same thing – nothing. Your image would be completely black. So when it comes to exposure the thing to focus on is the output of the flash, your ISO, and the aperture used. Your shutter can be open for however long it takes to fire the flash. If you have your flash attached to your camera then probably 1/125th or slower, and if it isn’t attached, then however long it takes for each person to fire their flash.
To get a good sense of the output of your flash, find out what the guide number is. The way guide numbers work is this; If you have a guide number of 120 for your flash (guide numbers are usually calculated based on having your camera ISO sensitivity set to 100), then you take the distance from the flash to whatever it is lighting, say 10 feet, and divide the guide number, 120, by the distance, 10. This gives the aperture you should set your camera at. In this case it would be 12. If there is no F12 on your camera set the aperture to the closest thing to F12 or adjust your flash distance a little. From there you can finagle your ISO, aperture, flash distance, or if your flash has an output setting you can adjust that a little to get the perfect exposure.
#6 Understand Composition
There are a lot of great guidelines out there to help get you started down the road to making more aesthetically pleasing images; The rule of thirds, simplicity, repetition, balance, contrast, etc. But while applying these guidelines may help a not-so-great picture look better, the bigger question is how do you compose a compelling image that visually communicates the story or message you want to tell.
I believe that the secret to this is not simply learning the guidelines of composition, but learning to both look more deeply into what is being included in the image you are about to take and asking yourself, does everything I am about to include in this image contribute to the story and communicate the message I am trying to get across? If it doesn’t, shift your position a little or a lot, until you find the shot that does. If you don’t know what story your are trying to tell or what it is you are trying to communicate, then use the guidelines of composition, but if you do have a story, and idea, a feeling that you want to visually communicate, think before you release the shutter.
Another point to make, is that in most cases, with cave photography beyond the entrance, there are no spontaneous images. Most gorgeous cave shots were not captured in the moment they were happening. In other words the photographer didn’t whip out his camera just as a group of cavers were trudging through the water, taking survey shots, rappelling the pit, climbing the wall, and walk away with an amazing image. The reason for this is because there is no natural light in caves, which means you first have to set up the lights, and setting up lights takes time and help from other cavers.
So when it come to creating a spontaneous, candid looking shot you have a couple of options. First, learn how to work with people to get them into a position that looks natural and exciting. Standing like a post, looking at a formation, is not that exciting. Resting after a long journey, hiking through the cave, reading survey instruments, climbing a wall, navigating a pit, bridging a passage is much more interesting and tells the viewer about the experience of being in the cave. Second set up your lights and then let cavers pass through your scene firing the flashes at just the right moment. Remember that everything needs to contribute to the story. Moving the head, feet, arms, fingers, backpack, etc. just a few inches can make all the difference between an awkward photo and a truly amazing image.
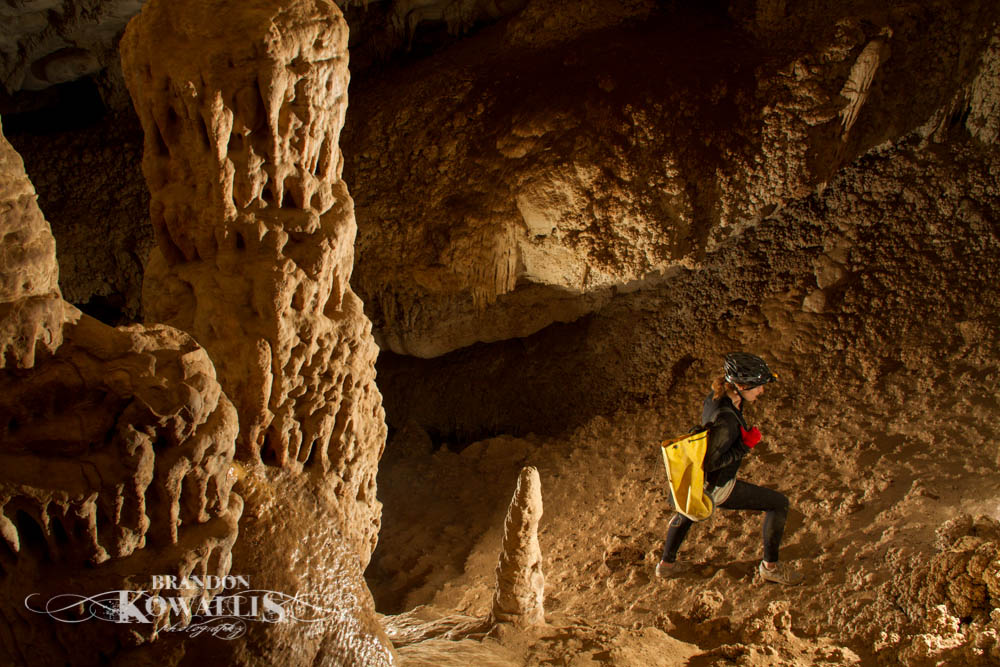
Though it may seem otherwise the caver in this shot isn’t actually walking. She was standing perfectly still. Everything down to the fact that she is holding a backpack over her right shoulder and the exact position of her feet were staged to give the impression of traveling energetically through the remote regions of this cave.
